Authentication
To get started with the Demos sdk, you need to create master seed for your wallet. The master seed is a 12 or 24 word mnemonic that can be used to recover your keypairs.The
demos.connectWallet method accepts either a mnemonic or a 128 byte seed buffer.If you provide any other buffer or string, it will be hashed using SHA-512 to get a 128 byte seed buffer which will be used as the master seed.demos.connectWallet method accepts two fields for the options parameter
-
algorithm: string- The algorithm to generate keypairs for, and use for signing transactions and transmissions. Available options are["ed25519", "falcon", "ml-dsa"]. Defaults toed25519. -
dual_sign: boolean- Only applicable when using a PQC algorithm in the previous option. If true, includes both the PQC signature and ed25519 signature in signed transactions. Defaults tofalse. To use only the PQC signature in transactions, please check out PQC identities.
getAddress method.
What is a master seed?
With the introduction of Quantum-safe algorithms with support for ed25519, a lot of key types need to be generated. To keep this organized, a master seed is used together with a key derivation function to generate deterministic seeds for the various key types. These seeds are then used to generate keypairs.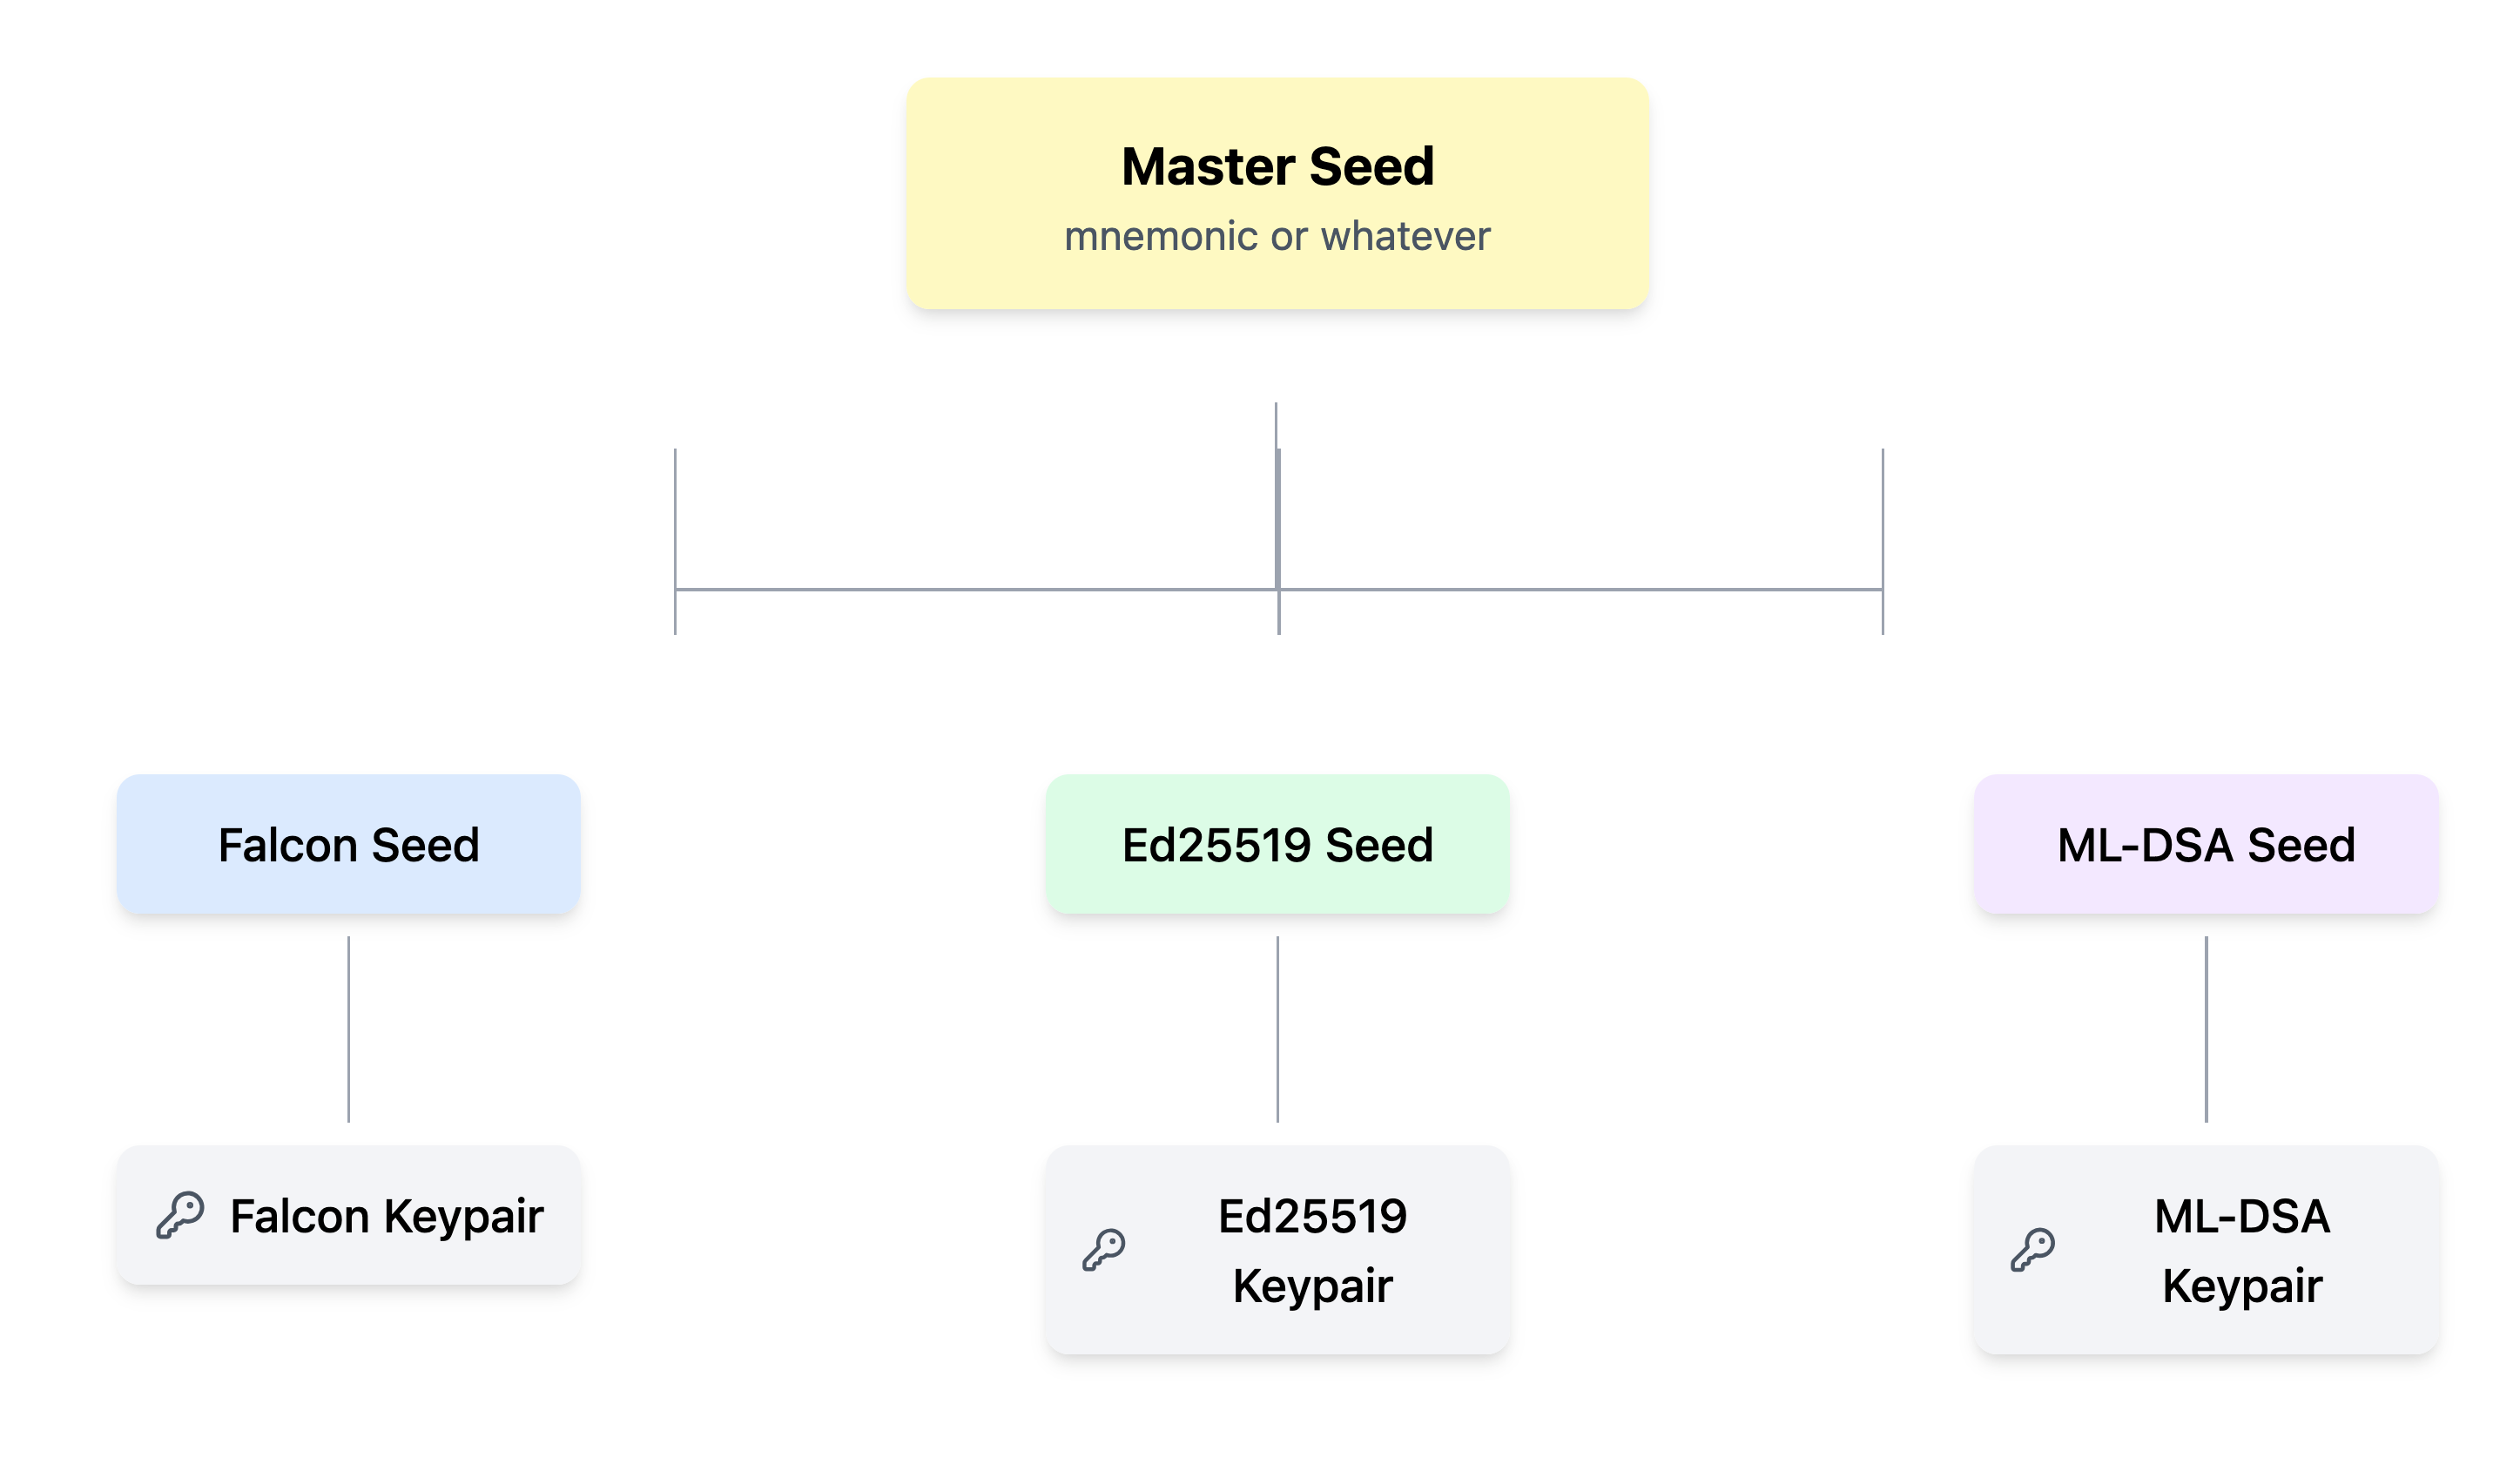
Accessing your keypairs
You can access the keypairs generated by your master seed by tapping into thedemos.crypto object. For example, to retrieve your ed25519 keypair:
Signing and verifying messages
You can sign messages using your connected keypair as shown:Connecting to a RPC node
You can connect to the DEMOS block chain via a RPC node. Here is a list of public DEMOS nodes. You can connect to a demos RPC node using the sdk as follows:demos.connect method confirms that the RPC URL provided is online. If the method exits without throwing an error, you are now ready to query the blockchain via NodeCalls.